Creating simple, clear screen-recorded tutorials is one of the easiest ways to teach online—whether you’re helping clients, training employees, supporting customers, or building your YouTube channel.
The good news? You don’t need expensive gear or advanced editing skills. With the right screen recording tools and a simple workflow, anyone can learn how to record your screen for tutorials that look professional and are easy for viewers to follow.
In this in-depth guide, you’ll learn:
- Which software tools you can use (free and paid)
- How to plan, record, and edit your screen tutorials step by step
- How to capture clear audio and smooth video
- The best settings and formats for uploading and sharing
- Common mistakes to avoid so you look confident and professional
Let’s break it all down in a friendly, beginner-friendly way so you can start recording your first tutorial today.
What You Need Before You Start Recording
Before you hit the record button, a little preparation will save you a lot of editing time and retakes.
1. A Clear Purpose for Your Tutorial
Ask yourself:
- Who is this tutorial for? (beginner, intermediate, advanced)
- What problem am I solving?
- What is the final outcome the viewer should achieve?
Write a one-sentence goal, for example:
“This tutorial shows beginners how to record your screen for tutorials using a free screen recording tool on Windows.”
Keep this goal visible while recording. It will keep you focused and prevent you from rambling.
2. A Basic Script or Outline
You don’t need a word-for-word script, but a simple outline helps:
- Introduction – Who you are and what the tutorial covers
- Requirements – What software tools or accounts are needed
- Steps – The actual process in logical order
- Summary / Call to action – What viewers should do next
You can write:
- Open the screen recorder
- Select window/region
- Adjust microphone and system audio
- Start recording
- Stop and save
- Export and share
This structure makes editing easier and keeps your screen recording tutorial clear and easy to follow.
3. The Right Environment
To record your screen for tutorials with minimal distractions:
- Find a quiet room
- Turn off notifications (email, messages, calendar pop-ups)
- Close unnecessary browser tabs and apps
- Set your desktop background to something clean, neutral, or blurred
This avoids embarrassing notifications and keeps the viewer focused on what matters.
Choosing the Right Screen Recording Tools
There are many screen recording tools available. You don’t need the most advanced one; you need the one that matches your needs and skill level.
Below are the main categories of software tools you can consider.
1. Built-in Screen Recording Tools (Windows & Mac)
Most computers already have basic tools for recording your screen.
On Windows:
- Xbox Game Bar (Windows 10/11)
- Press Win + G to open
- Click the capture icon → Start recording
- Good for capturing app windows and simple walkthroughs
- Snipping Tool (with screen recorder in newer versions)
- Great for quick short recordings
On macOS:
- Screenshot Toolbar (Shift + Command + 5)
- Select “Record Entire Screen” or “Record Selected Portion”
- Simple and built-in
- QuickTime Player
- File → New Screen Recording
- Offers basic screen and audio capture
These are perfect if you just want a simple way to record your screen for tutorials without installing extra software.
(Internal link → /screen-recording-tools/)
2. Free Dedicated Screen Recording Software
If you want more control, feature-rich screen recording tools are the next step.
Popular options include:
- OBS Studio (Windows, Mac, Linux)
- Free and open source
- Great for YouTube creators, gamers, and live streaming
- Can record screen + webcam + multiple audio sources
- ShareX (Windows)
- Free, lightweight
- Advanced settings and automation
- Good for power users who like flexibility
These software tools are excellent if you’re serious about content creation and don’t mind a small learning curve.
3. Easy Online & Cloud-Based Recorders
If you want something quick and user-friendly with minimal setup:
- Loom
- Browser extension + desktop app
- Record screen + webcam with a simple interface
- Share via link instantly
- Screencast-O-Matic / ScreenPal
- Simple online tool with basic editing
- Good for teachers, support teams, and quick walkthroughs
These are perfect if you create tutorials for clients, customers, or internal teams and want quick sharing without complex settings.
Understanding What to Record (And How)
To record your screen for tutorials effectively, it helps to know what types of screen recordings you can create.
1. Full Screen vs. Specific Window vs. Custom Region
Most screen recording tools offer three options:
- Full Screen
- Captures everything on your display
- Good for software that uses multiple windows
- Risk: accidentally recording notifications or unrelated content
- Specific Window
- Records only one app (e.g., your browser, PowerPoint, or software interface)
- Cleaner and more focused
- Custom Region
- Lets you select a specific area of your screen
- Ideal if you want to hide other elements or keep aspect ratio (16:9)
For most tutorials, window or custom region gives the cleanest result.
2. Screen + Webcam (Picture-in-Picture)
Viewers love seeing the instructor’s face because it feels more personal.
Many screen recording tools allow:
- Screen as the main view
- Small webcam box in the corner
- Option to reposition or resize the webcam frame
Use this when:
- Building online courses
- Coaching or training remotely
- Creating brand-focused YouTube tutorials
If you’re shy on camera, don’t worry—you can start with just screen + voice, and add webcam later.
3. System Audio vs. Microphone
You need to decide what audio to capture:
- Microphone (voice) – For your explanation
- System audio – For internal sounds (app pings, video playback, demo audio)
Ideally, you should capture both when needed:
- Turn off unnecessary app sounds
- Check that your microphone levels are not peaking (distorting)
- Do a quick 10–20 second test recording and replay it
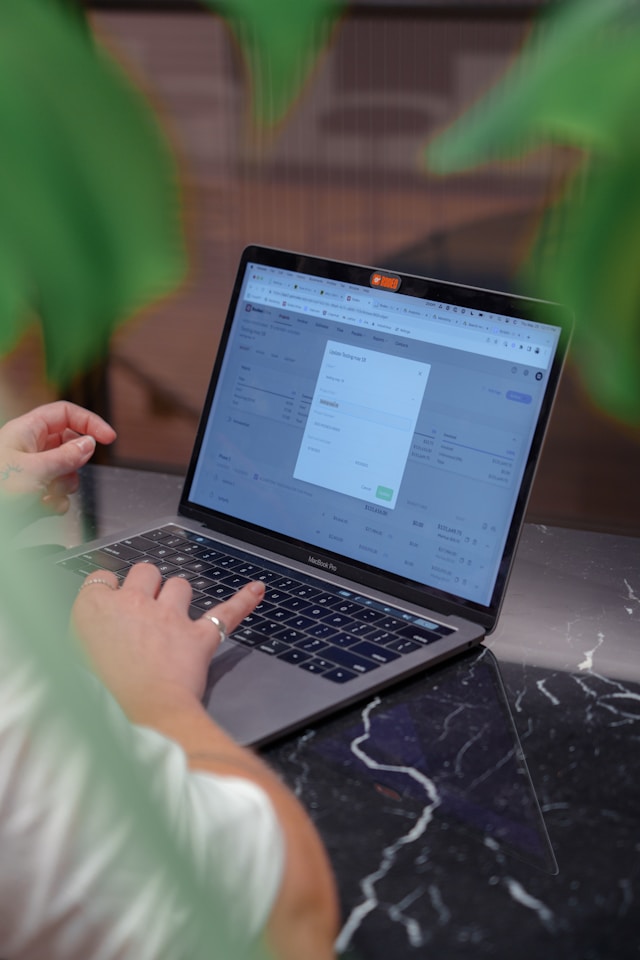
Step-by-Step: How to Record Your Screen for Tutorials (Generic Workflow)
Although each tool is a bit different, most follow the same simple process. Here’s a general step-by-step guide you can adapt to any screen recording tools you choose.
Step 1: Install or Open Your Screen Recorder
- Open your built-in recorder (Game Bar, QuickTime, Screenshot Toolbar)
OR - Install a dedicated tool like OBS Studio, Loom, or ScreenPal
Make sure:
- Your app is up to date
- You have granted necessary permissions (especially on macOS, which often asks for screen recording permissions in System Settings)
Step 2: Set Up Your Recording Area
- Choose Full Screen, Window, or Custom Region
- Ensure the content you want to record is visible and ready
- Adjust window size so it fits a 16:9 aspect ratio where possible (e.g., 1920×1080, 1280×720) for better compatibility with YouTube and most players
Step 3: Configure Your Audio
- Select your microphone
- Prefer an external USB mic or quality headset for clear audio
- (Optional) Enable system audio
- Useful when you’re showing video clips or application sound
Always do a quick test:
- Record a short 10-second clip
- Play it back
- Check that your voice is clear, not too quiet or too loud
Step 4: Enable Webcam (Optional)
If you want your face on screen:
- Turn on webcam overlay in your screen recording tool
- Position the webcam window in a corner where it doesn’t hide important buttons or menus
- Check lighting and background (simple is better)
Step 5: Start Recording
Now you’re ready to record your screen for tutorials:
- Take a deep breath
- Click Record
- Wait for the countdown (if available)
- Start speaking clearly and follow your outline
Tips while recording:
- Use your mouse deliberately, move it slowly and clearly
- Pause briefly before major steps to give viewers time to follow
- If you make a mistake, pause for a couple of seconds and then repeat the line—this makes it easier to cut out errors during editing
Step 6: Stop and Save
When you’re done:
- Click Stop in your recorder
- Choose a file name that makes sense (e.g.,
how-to-record-screen-windows-tutorial-v1.mp4) - Save in a dedicated folder for your tutorial project
 1")
Recommended Screen Recording Tools for Different Needs
Picking the right tool depends on your budget, platform, and how advanced you want your tutorials to be.
1. For Complete Beginners
If you just want something that “works” with minimal setup:
- Loom
- Super easy for quick tutorials
- Browser and desktop app available
- Great for client walkthroughs, team explanations, and support videos
- ScreenPal (formerly Screencast-O-Matic)
- Simple interface
- Free tier with basic features
- Good for teachers and business training
These tools are perfect if your main goal is to make simple tutorials quickly, not to master complex editing.
2. For YouTube Creators and Online Educators
If you want more control and customization:
- OBS Studio
- Multi-scene setups (screen, webcam, images, overlays)
- Great for recording and live streaming
- Completely free
- Camtasia (Paid)
- All-in-one screen recorder + editor
- Drag-and-drop timeline
- Annotations, cursor effects, callouts
- Ideal for professional-looking tutorial series and course creators
These screen recording tools are popular among creators who want to build a serious tutorial or training library.
3. For Mac Users Who Want It Simple
- Screenshot Toolbar / QuickTime (built-in)
- Great for basic tutorials
- Combine with iMovie for editing, cutting, and adding titles
- ScreenFlow (Paid)
- Mac-only, smooth editing and animation tools
- Very popular among course creators
Editing Your Screen Recording for a Professional Finish
Recording is only half the job. A little editing can transform a rough recording into a polished tutorial.
1. Basic Edits You Should Always Do
At minimum, try to:
- Trim the beginning and end
- Cut out moments where you’re getting ready or switching windows
- Remove obvious mistakes
- If you stutter or click the wrong button, cut that part out
- Adjust audio levels
- Make sure your voice is consistently audible
Most free tools (like Clipchamp, iMovie, or even built-in editors) can handle these simple edits.
2. Add Visual Guidance
To make it easier for viewers to follow along:
- Add text labels for key steps (e.g., “Step 1: Open Settings”)
- Use highlighting or zoom-in effects to focus on important buttons
- Add cursor highlighting or click effects if your tool supports it
These small touches are powerful, especially when your goal is to teach beginners step-by-step.
3. Use Background Music Carefully
Soft background music can make your tutorial feel more engaging, but:
- Keep the volume very low
- Use royalty-free music
- Make sure it doesn’t distract from your voice
If in doubt, skip background music and focus on clear voice narration.
 2")
Exporting and Saving Your Tutorial (Best Settings)
When you finish editing, you’ll need to export your video in a suitable format.
1. Recommended Video Format
In most cases, the best settings are:
- Format: MP4
- Codec: H.264
- Resolution:
- 1920×1080 (Full HD) if possible
- 1280×720 (HD) if your computer is weaker or you want smaller files
- Frame rate: 25–30 fps is fine for tutorials
These settings give a good balance between quality and file size and work well on YouTube, course platforms, and websites.
2. File Size Tips
To keep file size manageable:
- Avoid super high resolutions (like 4K) unless necessary
- Use the “medium” bitrate preset if your editor offers it
- Split very long tutorials into shorter videos (for example, Part 1, Part 2)
This makes uploading, streaming, and downloading smoother for your viewers.
3. Organize Your Files
Create a simple folder structure like:
- Tutorials
- How-to-record-screen
- Raw recordings
- Edited project files
- Exported videos
- How-to-record-screen
This way, if you need to re-edit a tutorial later, you’ll find your files easily.
Where to Share Your Screen Recording Tutorials
Once your video is ready, it’s time to share it with the world.
1. YouTube
YouTube is perfect if you want public visibility and discoverability.
- Create a clear title (e.g., “How to Record Your Screen for Tutorials (Free & Easy)”)
- Add a keyword-rich description including phrases like “screen recording tools” and “software tools for tutorials”
- Use timestamps in the description to break down steps
2. Course Platforms and Membership Sites
If you sell courses or training:
- Upload to platforms like Teachable, Thinkific, Kajabi, or your LMS
- Organize your videos into modules and lessons
- Add downloadable PDFs or checklists to support your tutorials
3. Client & Team Training
For internal or client-focused tutorial videos:
- Use Loom, Google Drive, Dropbox, or private Vimeo links
- Create a simple library or knowledge base where all tutorials live
- Group videos by topic (e.g., onboarding, tools training, advanced workflows)
Best Practices for Creating High-Quality Screen Tutorials
To make your tutorials stand out and keep viewers watching, follow these best practices.
1. Keep It Simple and Focused
- Avoid covering too many topics in one video
- Focus on one main goal per tutorial
- Use everyday language—assume the viewer is a beginner
2. Speak Slowly and Clearly
- Imagine explaining the steps to a friend
- Don’t rush through menus and options
- Pause briefly after each important action
3. Use Larger Text and Zoom
- Increase your system font size or app zoom level
- Use zoom-in effects during editing to highlight specific areas
This is especially important if viewers watch on phones or small screens.
4. Show, Then Tell (or Tell, Then Show)
Use a consistent teaching pattern like:
- Tell the viewer what you’re about to do
- Show it on screen
- Recap briefly what you just did
This repetition helps learners remember the process.
Common Mistakes to Avoid When You Record Your Screen for Tutorials
Even with good screen recording tools, some common mistakes can hurt the quality of your tutorials.
1. Recording in a Noisy Environment
Background noise (fans, traffic, people talking) distracts viewers. Use:
- A decent microphone
- A quiet room
- Noise reduction features in your recorder or editor, if available
2. Not Testing Before the Full Recording
Always do a test recording of 10–20 seconds:
- Check audio levels
- Ensure the correct screen or window is captured
- Confirm that system audio (if needed) is actually being recorded
This simple test can save you from recording an entire tutorial with no sound.
3. Moving Too Fast
Beginners may struggle if you:
- Skip steps
- Click too quickly
- Don’t explain why you’re doing something
Slow down. It may feel “too slow” to you, but it will feel “just right” for learners.
4. Overcomplicating the Tools
You don’t need to use every advanced feature of a screen recorder. Start with:
- Basic screen capture
- Voice narration
- Simple trimming
You can always learn advanced effects later.
Simple Starter Setups (Pick One and Start Today)
To make this practical, here are a few ready-made setups you can choose based on your situation.
Setup 1: Absolute Beginner (Zero Cost)
- Tool: Built-in screen recorder (Xbox Game Bar on Windows or Screenshot Toolbar / QuickTime on Mac)
- Editing: Use your system’s built-in editor or a free editor like Clipchamp or iMovie
Perfect if you want to record your screen for tutorials right now with what you already have.
Setup 2: Casual Creator (Easy and Shareable)
- Tool: Loom
- Features: Screen + webcam, instant link sharing, simple trimming
- Best for: Client walkthroughs, internal training, support teams
Setup 3: Serious YouTube or Course Creator
- Tool: OBS Studio or Camtasia
- Editing: Built-in (Camtasia) or external editor like DaVinci Resolve (free)
- Best for: Full series of professional tutorials, courses, and branded content
Choose one setup that fits your current goals, and refine your tools as you grow.
Conclusion: You’re Ready to Record Your First Tutorial
You don’t need to be a tech expert to create helpful, professional-looking screen tutorials.
By now, you’ve learned:
- How to choose the right screen recording tools and software tools
- How to plan your tutorial so it’s clear and focused
- A step-by-step process for how to record your screen for tutorials
- How to edit, export, and share your videos with your audience
- Best practices and common mistakes to avoid
The most important step is the first one: pick a tool, outline a simple topic, and record your first video. Your early tutorials don’t need to be perfect—they just need to be useful. You can always improve as you go.
Frequently Asked Questions
No. Many of the most profitable ways freelancers use AI to earn online are non-technical, like content writing, social media, and virtual assistance. Most AI tools are built with user-friendly interfaces. If you can use a browser, you can learn them.
Yes. Beginners can practice with AI on their own projects, create sample work (articles, designs, videos), and offer low-cost or pilot packages to first clients. AI helps you move from “learning” to “offering services” much faster, as long as you’re willing to practice and improve.
Most clients care about results: quality, speed, and reliability. Some may even be excited that you know how to earn with AI tools and use them efficiently. If they ask, be honest and focus on how AI helps you deliver better work, not replace your skill.
You stand out by combining AI efficiency, strong communication and reliability, real understanding of your client’s business and audience, and niche expertise (e.g., “AI-powered content for fitness brands” or “short-form video repurposing for coaches”). AI is a tool, not your brand. Your unique positioning is what clients remember.
There is no single “best” tool for everyone. It depends on your service: writers use AI writing and SEO assistants, social media managers use AI caption and idea generators, designers use AI image and design tools, and video editors use AI video clipping and captioning tools. Pick one service area and then choose a tool that fits that role. Start small, learn deeply, and expand later.